I have had the HP Martini Jacket pattern for a while, but was undecided on fabric. I could see this being a really solid piece in my wardrobe.
Well my idea of a neutral colour went out the window when I found 'the' fabric. A gorgeous poly/viscose fabric with a quilted look and a large floral printed on it.
I wasn't thinking of the conundrum of pattern matching and other such trifles - I just had to have it!
I spent a while just staring at the fabric, trying to decide the best way to cut it out, so that the pattern at least looked like I had endevoured to match up some of it. In the end, I only had to re-cut one side front piece that didn't look quite right.
The pattern pieces went together well, and the instructions were one of the earlier Hot Patterns, so more a suggested order of construction and no diagrams. This was generally fine for me, though not necessarily suitable for a beginner.
I only had to refer to a reference book for a little help on the shawl collar as this was not a technique I had come across before. Now that I understand how this is meant to go, the instructions were fine.
I ended up pressing all my seam allowances open, and then binding them with rayon seam binding. I used this tutorial by Laura Mae of the blog, Lilacs and Lace.
The fabric has a spongy texture, so I ended up also topstitching all my seam allowances down after they were bound, and then went mad and also bound all the edges of my facings too. I think it looks really nice, but wow, it took a lot longer!!
I also found the perfect buttons at Made on Marion - thanks Maryanne!
I am so pleased with how the pattern came out, and my fabric choice - my only disappointment was that it is just a tiny bit tight through the shoulders... aaargh!
On the upside, I found more of the fabric in the Fabric Warehouse pop-up sale, so after I have re-made this in the next size up (in different fabric) to check for better fit, I am TOTALLY making this again in this fabric.
Wednesday 23 October 2013
Wednesday 16 October 2013
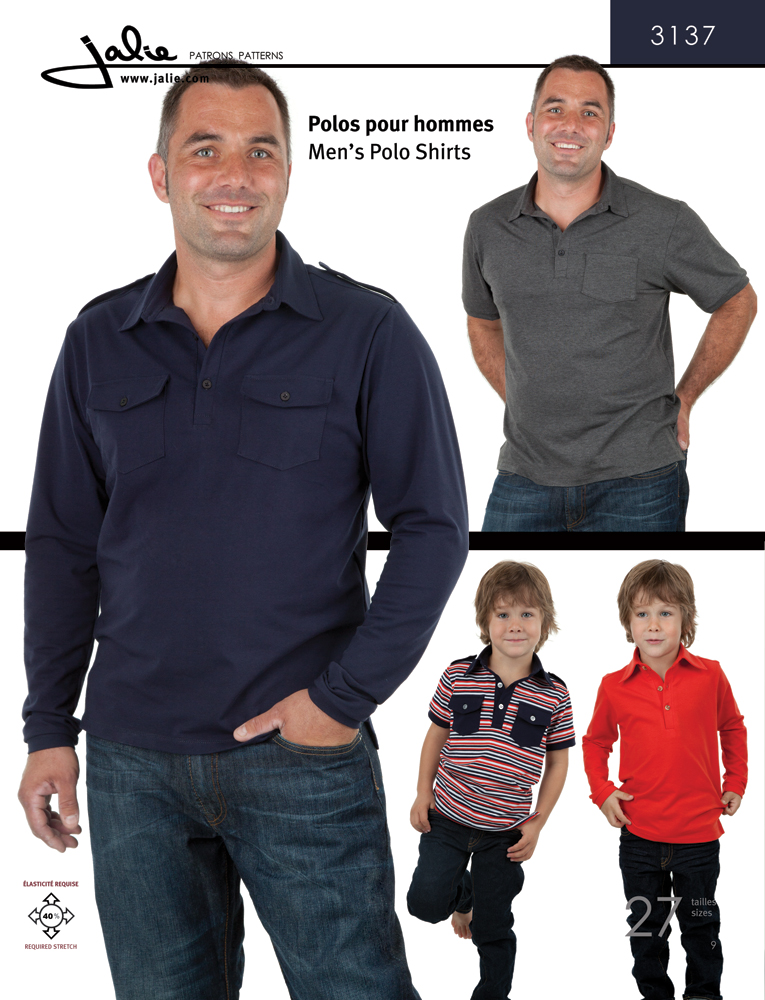
Men's (and Boy's) Rugby Jersey - Jalie 3137
Pattern Description: Polo shirt with standing collar, buttoned placket, shoulder tabs, back yoke and forward shoulder seam, short (A) or long (B) banded sleeve, two chest pockets with flaps and side seam slits.
.
Pattern Sizing: Toddler 2 to Mens 50" chest
Were the instructions easy to follow? Yes, the instructions were excellent - well written with lots of diagrams.
Fabric Used: 100% cotton rugby knit for the shirt body, and cotton ripstop/cotton drill for the collar and front placket. Snaps instead of buttons.
 |
| Hubby's jersey - still haven't managed a photo of him wearing it! |
I changed the collar to a woven fabric to make it look more like a traditional rugby jersey. This worked fine as the rugby knit used for the body does not have much stretch.
Next time, I would make a size or two up for the rugby knit, as it ended up quite slim fitting. My husband was initially a bit worried it was too slim fitting, but decided it was fine after he got some favourable comments when he wore it to work. My son would also prefer his a bit more roomy.
  |
| T more than happy to stand around for photos. (and show off matching side seams) |
I would also possibly merge the back yoke and back piece into one, as it doesn't provide any shaping.
Would you sew it again? Yes, I will be making this again, as both my husband and son have requested more. I can see this pattern getting a lot of use for both polo tees and more rugby jerseys.
Conclusion: A great TNT pattern at our house full of boys!
Wednesday 9 October 2013
Hot Patterns Weekender Cabana T's
Pattern Description: Super-chic but oh-so-simple T-Shirts are designed for T-Shirt or sweater knits with a little stretch: perfect for mixing prints for a funky look! Relaxed-fit T-Shirts have a very slightly A-line shape, with a scooped neckline. Short-sleeved T-Shirt has center front & back seams; 3/4 sleeved T-Shirt has a bias-cut breast pocket. Both styles feature a bias-cut neckband, deep hems and optional cover-stitch trim.
Pattern Sizing: 6 -26
Did it look like the photo/drawing on the pattern envelope once you were done sewing with it? Yes, I think they looked fairly similar exceptig I left off the pocket.
Were the instructions easy to follow? Yes, the instructions were good with some diagrams.
What did you particularly like or dislike about the pattern? It lends itself to lots of differet looks depending on the knit used.
It is a bit tricky getting the neckband on with the right tension. My first attempt was the most successful, because it was made from a slinky type knit that had plenty of stretch.
My second version was from a terry knit with not a lot of stretch, so the neckband piece was too short.
My third version was from a striped merino jersey. I lengthened the neckband piece slightly, but this ended up being too much and would have probably been fine with the original neckband length.
Fabric Used: A slinky knit, that I've finally got to the end of!
A black merino terry knit
A striped merino jersey
Pattern alterations or any design changes you made: My first version was a size 16, as per my measurements. This felt just a bit too big.
For my next two versions I sized down to a 14, which felt like a much better fit to me.
Would you sew it again? Yes, I've made this three times already, and will definitely make it again.
Conclusion: A good basic tee for my wardrobe.
Wednesday 2 October 2013
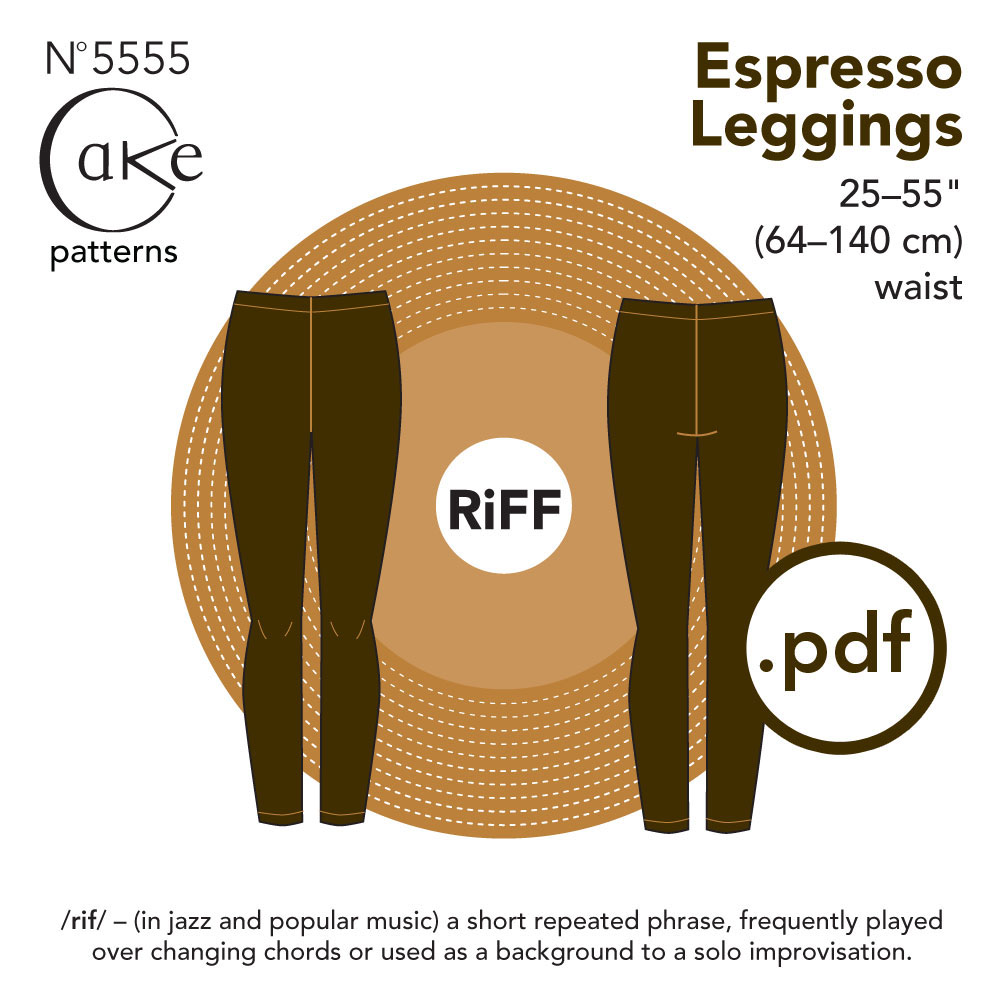
Cake Patterns Espresso Leggings
Pattern Description: Create custom-fit leggings in a flash! The innovative Espresso template from Cake RiFFs makes it simple - just measure, mark, and connect the dots for a pattern that fits just right and sews up quickly. Elastic waistband slips smoothly beneath other layers.
Pattern Sizing: 25 - 55" waist.
Did it look like the drawing on the pattern envelope once you were done sewing with it? Yes, they are a fair representation.
Were the instructions easy to follow? Yes, the instructions both for drafting the pattern to your measurements, and the construction were excellent.
Fabric Used: a slinky type knit
Pattern alterations or any design changes you made: none, these are as drafted. Next time, I will lower the waistline a little as I think I erred in my self-measuring.
Would you sew it again? Yes, I will definitely make these again. I love to wear leggings rather than tights under my winter boots, and I can have some fun with some knits.
I think these would also be excellent for custom drafted thermal leggings too.
Conclusion: A quick easy pattern, with awesome results.
Subscribe to:
Posts (Atom)


